Showing posts with label Crafts. Show all posts

Friday, November 30, 2007

Salt Dough Ornaments


I've always wanted to make salt dough ornaments, but never have, which is lame because a) it is really easy and b) it really only takes salt, water, flour, string, and then whatever you want to use to decorate them.

The other night I decided to whip some up (let's remember that handy term "mock-up") (this means, don't expect anything skilled or fabulous from this experiment). I looked up some online instructions first.


Here are your main ingredients:


Because this was just an experiment, I only used a cup of flour and about a half a cup of salt (I was a tad bit short because I need to buy salt). I added a little hot water, and stirred.

EASY.


It's supposed to look like cookie dough. I recommend you don't taste it.

I saw a lot of stuff about rolling out the dough and cutting out shapes, which would have been tidy and cute. However, I don't have a rolling pin or cookie cutters, because I am domestically deficient. I tried to smoosh the dough flat to see if I could cut out shapes with a knife:


But I think your results would be tidier if you used a rolling pin and cutters. At least, mine would have been. So I decided to just form the dough into little shapes instead. I made a couple of birds (here is a bird, mid-formation):


And, because I am weird and nothing says "Christmas" like "pet obsession," I made a couple of fat little cat-type shapes:


Then you take a toothpick or something else thin and pointy:
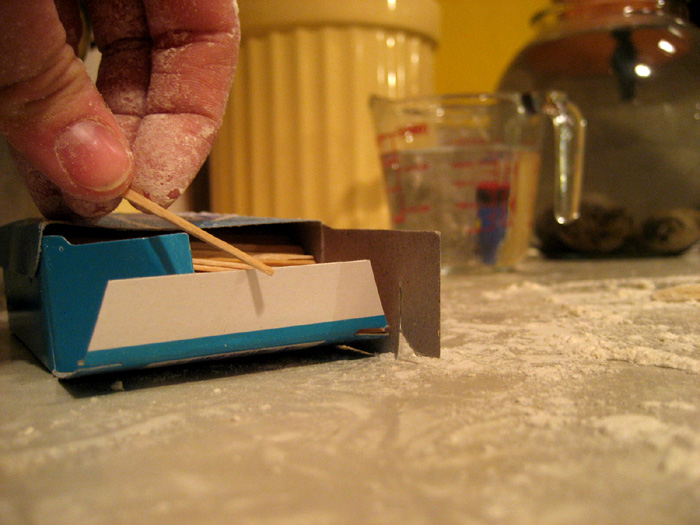


Make a hole (this is a circular shape, fancy). Later you will regret it if a) you do not make the hole wide enough or b) you do not put the hole at least 1/8 of an inch down. So make the hole wide enough to easily thread ribbon or string through.


And then pop them in the oven for a few hours at 100-200 degrees. Until they are hard. I think you can also just microwave them for a few minutes.

Someone needs to clean her oven:


So, the next night, I gathered up my random craft paint and a crappy craft brush. And the little hard dough creatures.


And painted away.


I'm dorky and tried to paint the cats similarly to their real-life, cranky and fat counterparts.

I think if I had spent more time, or played more with getting the texture of the dough just right, I could have made these look less lumpy and cruddy. I also read using a bit of oil on your hands will help keep the dough workable and smooth. However, this was just an experiment, so let's pretend these little guys don't look all...bumpy:


Then take your string or ribbon, and loop it, line up the two ends, and string them through the hole:

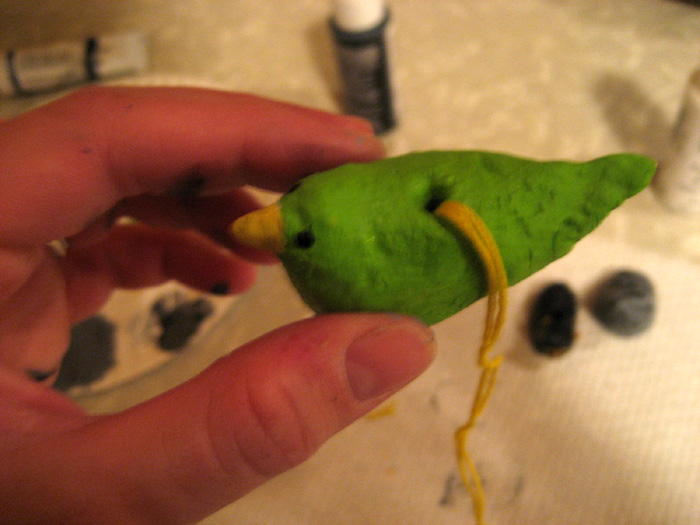


I didn't really wait until the paint was dry, so my string is all painty. Also, I didn't make the bottom part of the holes big enough, so I had to dig the string out with a needle.


That's okay. So I knotted the thread at the bottom, and trimmed off the excess:


And that was it! Home-made ornaments.


Like I said, if I spent more time, or used the cookie cutter method, my results would have been "better" and "less weird." But it was fun, and I can imagine decorating these with someone would be super fun.

Meta stuff:

If anyone else is interested in helping with this blog, let me know.

ALSO: EMAIL ME GIFT IDEAS OF ALL KINDS, because a big gift idea extravaganza should be blogged.

Monday, November 26, 2007

Christmas Card Recycling, Meta Stuff

I've done some research on ways to display/reuse your old Christmas cards, unless you have a holiday tradition of losing them/feeling guilty about losing them/finding them and putting them in a box you'll never, ever be able to locate again. (Or maybe that's just me.)

First up: Wreath Made of Cards!

I didn't have twenty cards lying around (see above tradition), so I cut up some construction paper and folded it and we'll all have to pretend these are cute holiday cards with snow and trees and kittens. Also, I did this in my studio, and my work bench is old and beat up, so forgive the surroundings.

The "cards":


Use the power of imagination! Can't you just see the sparkly reindeer?

For this you'll need roughly twenty cards, and it might be fun to use contrasting colors, or use all cards of a similar color, or use a theme such as all snowman cards, etc. You're only limited by the cards you've been hoarding (or losing).

First you'll need to draw a two inch by four inch rectangle on the back of a card and cut it out (my fake cards are small so my rectangle is also small).


Also, you may notice my work in these photos is a bit "relaxed" or "sloppy." Don't judge me; I'm still recovering from an obscene amount of mashed potato consumption. In the art world, this is what we call a mock-up, which is handy little term to say "this one is just a quick practice, please ignore all the crappy mistakes."

Anyway, cut out the rectangle with scissors or an Exacto knife, whatever you have that lets you cut out rectangles.


Then trace the rectangle on the fronts of the rest of the cards and cut them out. Use that first rectangle as a template so you don't have to remeasure.


Now arrange them into a round shape, by putting the corner of each card into the rectangle of the previous card. Like so (bonus--awkward hand!):


Take this time to check out the circle, and rearrange the cards how you want them. If you want to move the reindeer card away from the snowman card because they don't look as if they are getting along, do it now.


Then, glue the edges of the cards together. I used my disgusting old hot glue gun because it was closest, but I recommend other (safer) methods as well. Any old glue should work.


Keep on gluing:


When you're done, and the glue is dry, flip over your wreath and glue down any parts that seem flimsy or floppy.


Finally, take a piece of ribbon or yarn or string and use it to make a hanger. You could punch a hole, or just glue it on, depending on the glue you use.


And there it is! A Christmas card wreath! Or, in my case, a sort of messy construction paper wreath! This is why I love the term "mock-up." To fancy it up, you could add a bow to the front, but it's not necessary. Just imagine these are cute Christmas cards, okay?


Okay, the next one I found was how to make neat little gift boxes out of cards. Good for jewelry, gift cards, etc.

I dug around and found a little note card, so the mock-up wouldn't be quite as lame as construction paper. First you cut the card's front off:


The back half of the card you will use for the bottom of the box. So take it and cut 1/8 of an inch off one short and one long side. (So it will fit easily when you close the box.) Just use a ruler and draw two little marks at the 1/8 inch mark on each side, draw a line between them, and cut.


See? Connect the dots, then slice away.


After that, put aside the back half. Take the front half of the card, flip it over to the blank side, and mark off 1 inch and 1/2 inch from each side.


Connect the dots!


Okay, now take the BACK of the blade of your exacto, or a pizza cutter, or something else thin and sort of sharp/sort of dull. Trace the lines (against a ruler) with it, so that you sort of score the lines to make folding more easy. You could also use a ball point pen and press down hard.

I didn't take a picture of that step, because I am one of those people who can just look at a butter knife and get a cut, so I tried to be careful and not multitask. You understand.

After you score, cut to the one inch mark, from the short side, on each edge, so you have little flaps.


Then fold the long sides on each of the lines.


Press the sides down:


Push in the flaps:


Fold in the flaps toward each other, then fold the short sides down over them. I had to use a bit of glue to keep it in place properly, but I hadn't been super careful with my measuring/drawing/folding. It might be easier if you are more precise--otherwise, the glue helps hold it all in place.

And then, you have a lid!


Just repeat on your slightly smaller piece to make the bottom. And you have a cute little gift box! This was just the right size for a gift card or jewelry or maybe a tidy little wad of cash.

If you're ambitious, or have even more cards stashed away, you can try one of these. I didn't try one today, but they look really neat and it says you can also use wrapping paper. I think several hanging in a window or doorway would be really, really pretty, and the site has handy print-out templates.

Blog business alert: if anyone out there is interested in helping with this site, shoot me an email. I'm trying to figure out how to keep up two blogs, work full time, be an artist, keep up an online store, take care of four pets, be a newly wed, and not suffocate under mountains of laundry and dog hair. If anyone would like to help with the recipes category, or the craft category, or has lots of ideas, or gets some sort of enjoyment out of editing/proofreading posts, or has tons of fun decoration knowledge, or knows how to find good deals on stuff, or is a Googling master, ANYTHING, let me know if you'd like to be a part of Maybe Painted Pink. I want this blog to be as fun and helpful as possible, and the reader emails/posts are AWESOME. I'd love to have some regular helpers. karamarie at gmail dot com.