
I've always wanted to make salt dough ornaments, but never have, which is lame because a) it is really easy and b) it really only takes salt, water, flour, string, and then whatever you want to use to decorate them.
The other night I decided to whip some up (let's remember that handy term "mock-up") (this means, don't expect anything skilled or fabulous from this experiment). I looked up some online instructions first.
Here are your main ingredients:

Because this was just an experiment, I only used a cup of flour and about a half a cup of salt (I was a tad bit short because I need to buy salt). I added a little hot water, and stirred.
EASY.

It's supposed to look like cookie dough. I recommend you don't taste it.
I saw a lot of stuff about rolling out the dough and cutting out shapes, which would have been tidy and cute. However, I don't have a rolling pin or cookie cutters, because I am domestically deficient. I tried to smoosh the dough flat to see if I could cut out shapes with a knife:

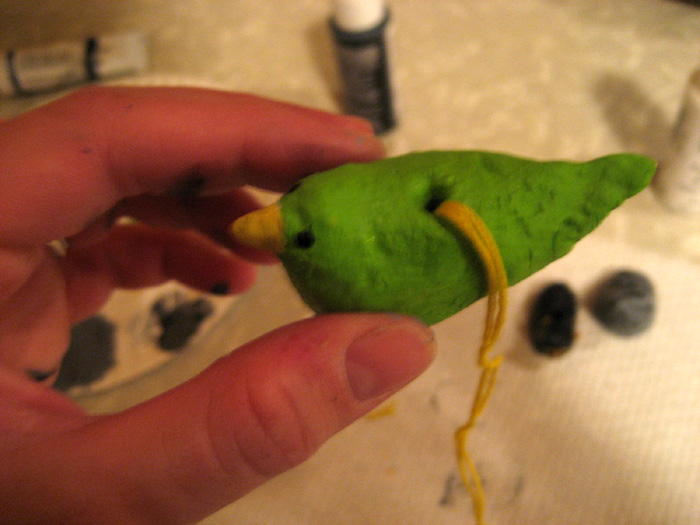
But I think your results would be tidier if you used a rolling pin and cutters. At least, mine would have been. So I decided to just form the dough into little shapes instead. I made a couple of birds (here is a bird, mid-formation):

And, because I am weird and nothing says "Christmas" like "pet obsession," I made a couple of fat little cat-type shapes:

Then you take a toothpick or something else thin and pointy:
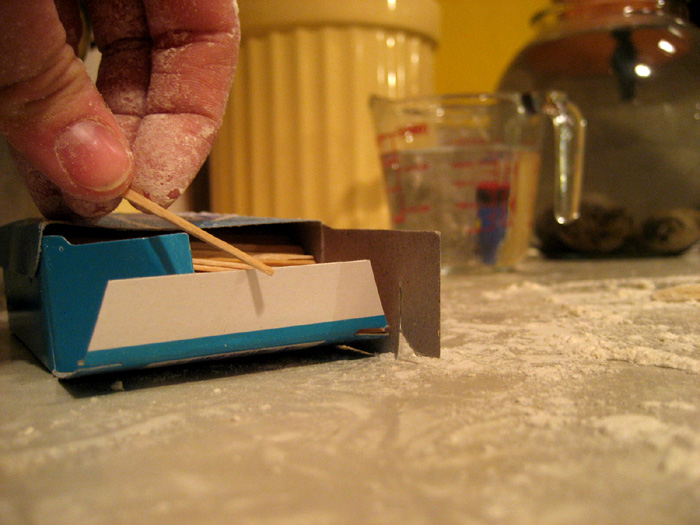
Make a hole (this is a circular shape, fancy). Later you will regret it if a) you do not make the hole wide enough or b) you do not put the hole at least 1/8 of an inch down. So make the hole wide enough to easily thread ribbon or string through.

And then pop them in the oven for a few hours at 100-200 degrees. Until they are hard. I think you can also just microwave them for a few minutes.
Someone needs to clean her oven:

So, the next night, I gathered up my random craft paint and a crappy craft brush. And the little hard dough creatures.

And painted away.

I'm dorky and tried to paint the cats similarly to their real-life, cranky and fat counterparts.
I think if I had spent more time, or played more with getting the texture of the dough just right, I could have made these look less lumpy and cruddy. I also read using a bit of oil on your hands will help keep the dough workable and smooth. However, this was just an experiment, so let's pretend these little guys don't look all...bumpy:

Then take your string or ribbon, and loop it, line up the two ends, and string them through the hole:

I didn't really wait until the paint was dry, so my string is all painty. Also, I didn't make the bottom part of the holes big enough, so I had to dig the string out with a needle.

That's okay. So I knotted the thread at the bottom, and trimmed off the excess:

And that was it! Home-made ornaments.


Like I said, if I spent more time, or used the cookie cutter method, my results would have been "better" and "less weird." But it was fun, and I can imagine decorating these with someone would be super fun.
Meta stuff:
If anyone else is interested in helping with this blog, let me know.
ALSO: EMAIL ME GIFT IDEAS OF ALL KINDS, because a big gift idea extravaganza should be blogged.
11 comments:
I made these as a kid! I'd forgotten about them. What a fun tradition.
A friend with a dog used to make her own dog biscuits (different recipe, but sure it's out there somewhere), and bake them until they were hard. If you were willing not to paint them but do interesting shapes with cookie cutters, then you could feed them to dogs. Or the dogs could knock over the tree trying to get them. I guess that's not such a good idea.
Also, a garlic smoosher thing will give you great little strings of dough for stuff like hair on angels or a hedgehog look on your cats. You've always wanted to have your cats look like hedgehogs, haven't you?
Ooh, good tip about the garlic press, pixelpi!
Those ornaments look fun! Do you seriously have that precious WHITE tree?? LOVE IT.
I want to DO THIS.
I may just get up the courage to do this with the kids...
I also have some gift ideas, so I'll email you soon.
Thanks for doing this blog- I know it's a lot of work, but it's so FUN for us!
You are so amazingly awesome I can hardly stand it!!!
Those turned out great, and I love how you included all the stuff like that the string got painty. I get overly perfectionist and discouraged--but when I see something awesome and see that it didn't have to be perfect in every detail to be awesome, it gives me courage and heart.
Last year we made ornaments out of cinnamon (it's applesauce, cinnamon, and white glue), and you can also use them as gift tags or just to hang around the house. They smell awesome.
Also, I'm putting all my gift idea posts/wish lists up at my blog if you want to check them out...
Thank you so much for this post! I remember making these as a kid and I loved it. This year is my daughter's first Christmas, so we are making "hand print" ornaments for our tree and for her grandparents. I can't wait!
I thought your website was adorable, delightful and funny! you are a crack up and I enjoyed it soooooo much! :)
Good to see various types of gifts on your blog. I have also gone through rakhi gifting site, it has unique gifts for brothers and sisters.
Post a Comment